


In this tutorial we’ll be creating a slot machine in Adobe Illustrator. We’ll build it from simple vector shapes, then color it, use the Appearance panel to add effects, use symbols, and apply the symbol tools. We’ll end up with a nice vector slot machine. Let’s get started!
Step 1
Now, before we start drawing, we need some inspiration. Go to your browser and search for slot machine images. See what elements compose the machines. Gather parts from various machines to create your own slot machine design. Be careful to not copy one image, but rather gather inspiration from many reference images, use your imagination, and compose your own unique creation.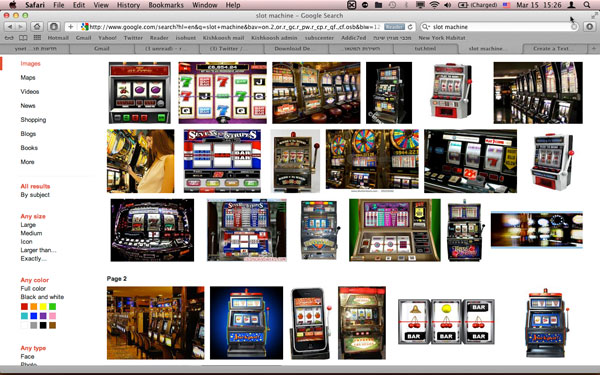
Step 2
Create a new Adobe Illustrator web document with a 600 x 800 pixel artboart. Give it a name – I called mine “slot_machine”. Now we’ll apply some setup to our Illustrator working environment. Go to the Symbols panel, click on the top-right button to open the drop-down menu and click on “Select All Unused”. Drag all the selected symbols to the trash icon to delete them.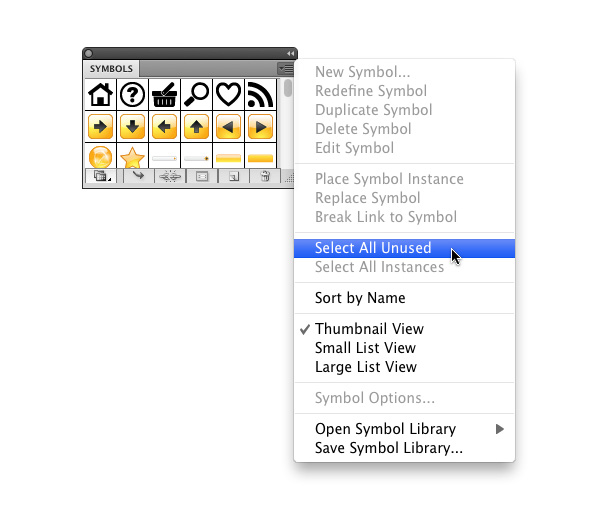
Step 3
We’re going to construct the machine from simple shapes, and when done we’ll add colors. With the Rectangle Tool (M), draw a 360 x 136 pixels rectangle. Leave it with the default Stroke and Fill, as we’ll be coloring the machine later on. Go to Object > Path > Offset Path… and enter -16 for the Offset value.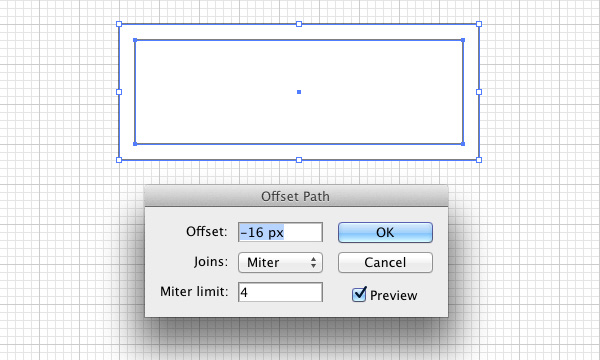
Step 4
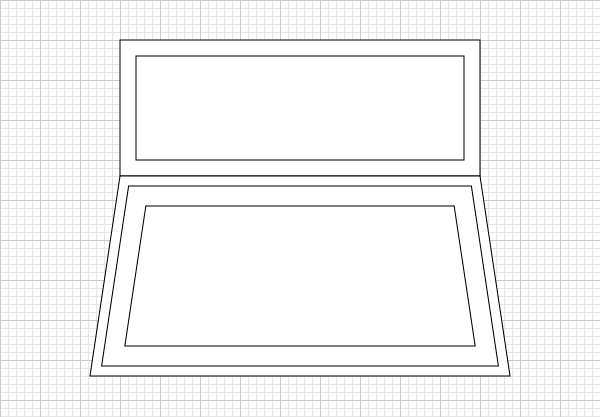
Create another rectangle, 360 x 200 pixels, and snap it to the bottom of the outer rectangle we created in the last step. Select the bottom-right anchor point with the Direct Selection Tool (A), hold the the Shift key, and press the right arrow key three times to move the point 30 pixels to the right.Do the same with the bottom-left anchor point to move it 30 pixels to the left. Your rectangle should now look like a trapezoid. As in the previous step, select your shape and offset the path, this time by -10 pixels. Then offset the inner trapezoid’s path by -20 pixels. Your artwork should now look like this:
Step 5
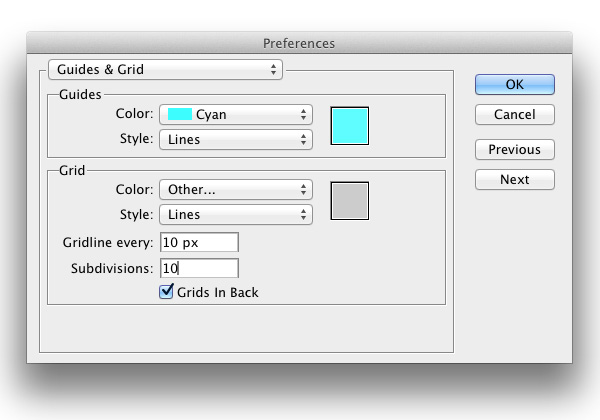
With the Pen tool (P), draw lines from the innermost trapezoid’s corners to the middle trapezoid’s corners. This is where having Smart Guides turned on becomes helpful, as it helps you spot the corners accurately. Select the two trapezoid shapes and the newly created lines, go to the Pathfinder panel and click “Divide”. Ungroup the divided shapes (Object > Ungroup).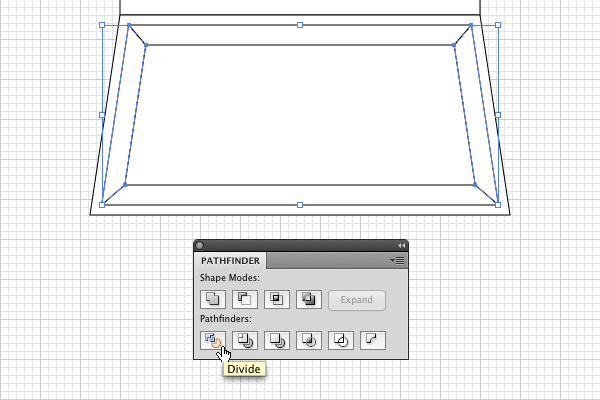
Step 6
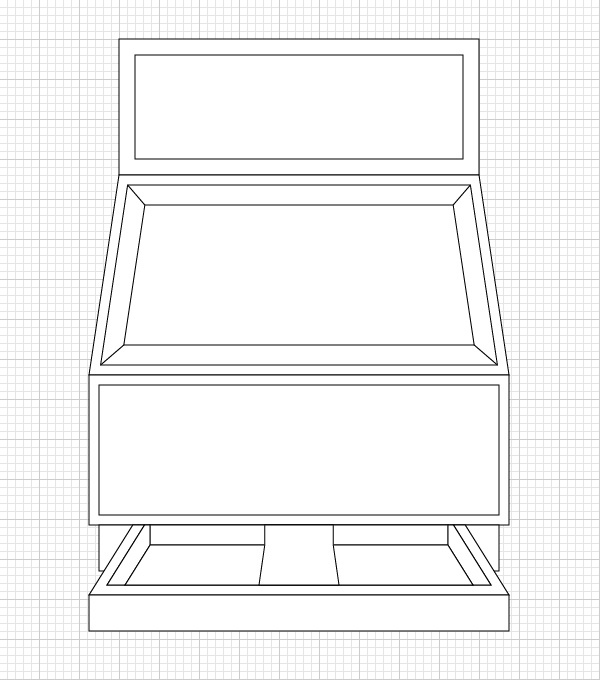
Draw a new 420 x 150 pixel rectangle, snap it to the bottom of the outer trapezoid and offset it’s path by -10 pixels. Create another rectangle, 400 x 46 pixels, and snap it to the bottom of the previously created rectangle. At this point, your machine should by now look like this: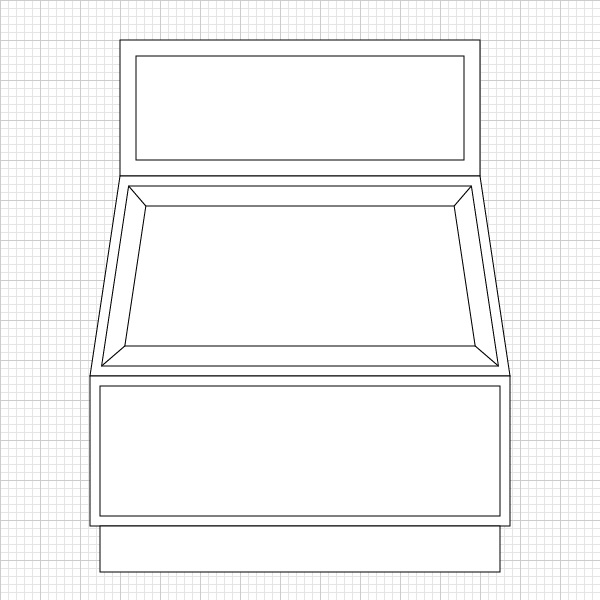
Step 7
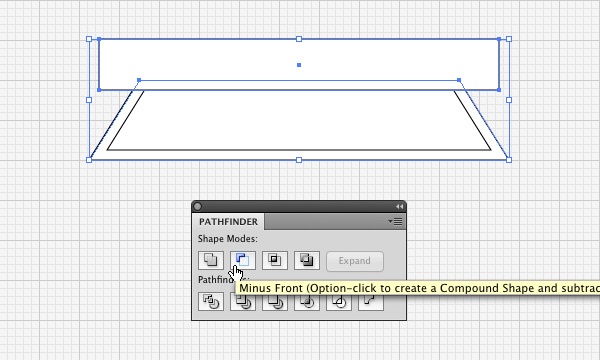
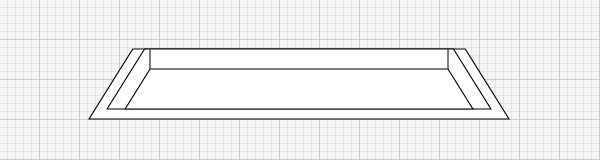
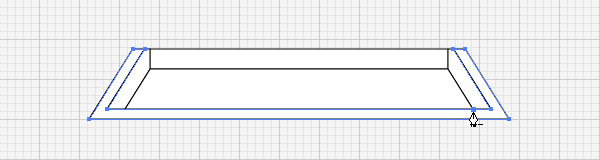
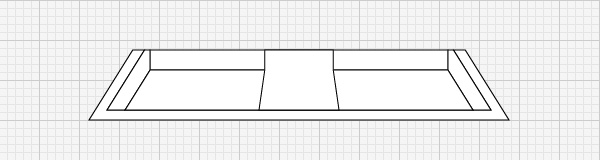
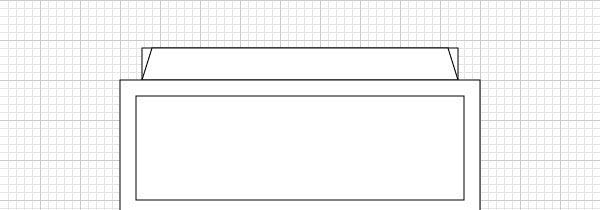
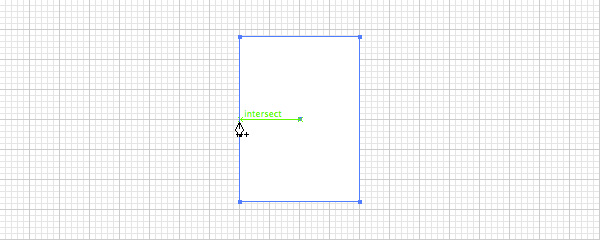
Now let’s draw the money drawer. Outside the artboard, create a 320 x 80 pixel rectangle. Move the bottom-right anchor point 50 pixels to the right, and the left one, 50 pixels to the left. Offset the shape’s path by -10.Draw a third rectangle that will cover the top 10 pixels of the outer shape. Select both the outer shape and the rectangle, go to the Pathfinder panel and hit Minus Front. Send the shape to the back using Command + Shift + [.
Step 8
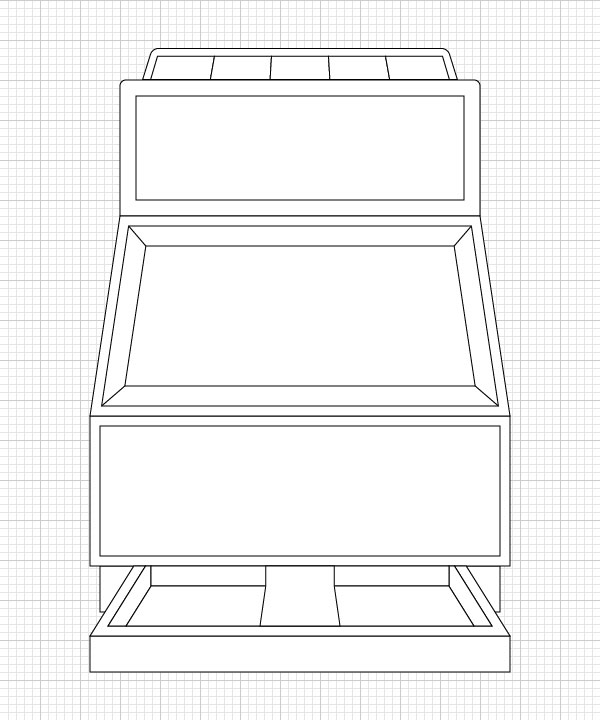
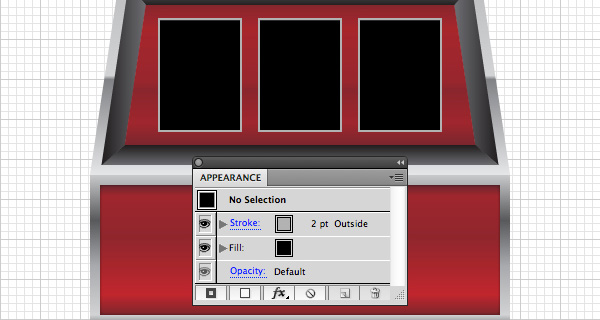
Create five 60 x 24 pixel rectangles in a row on top of the machine. Draw a 316 x 32 pixel rectangle and place it behind the five rectangles (Command + Shift + [). Align it to the bottom of the other rectangles. Now Group all the shapes.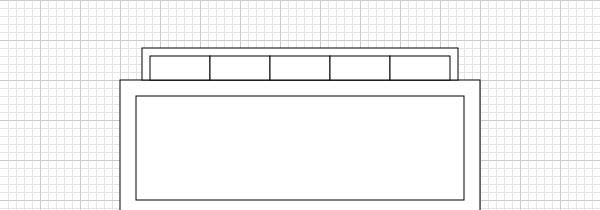
Step 9
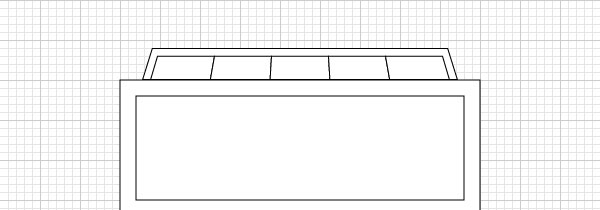
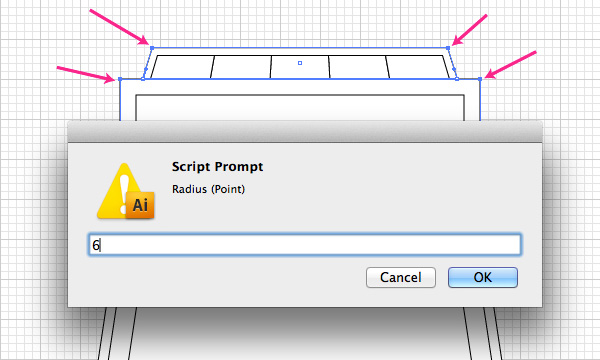
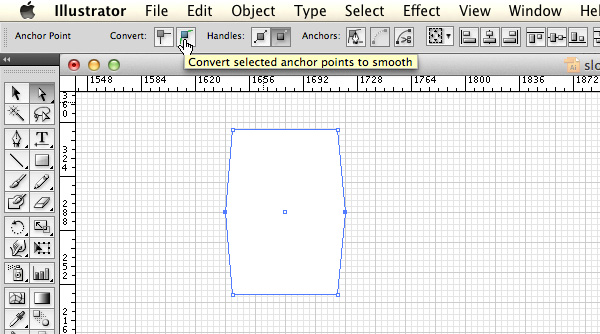
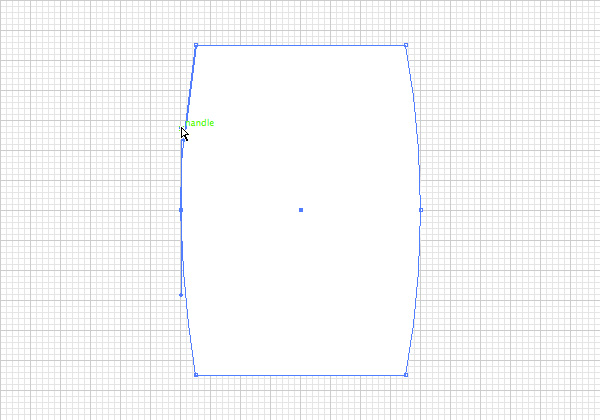
For this step I used an Illustrator script called “Round Any Corner.” It does exactly that: rounds only the corner you want, instead of all the object’s corners. You can read about it in the article on ways to customize Adobe Illustrator and download it here.Once you are set, use the Direct Selection tool (A) to select the 4 corners in image below, then click Command + F12, go to the folder where you saved the script file and open it. Enter 6 as the corner radius in the script prompt and click OK.
Step 10
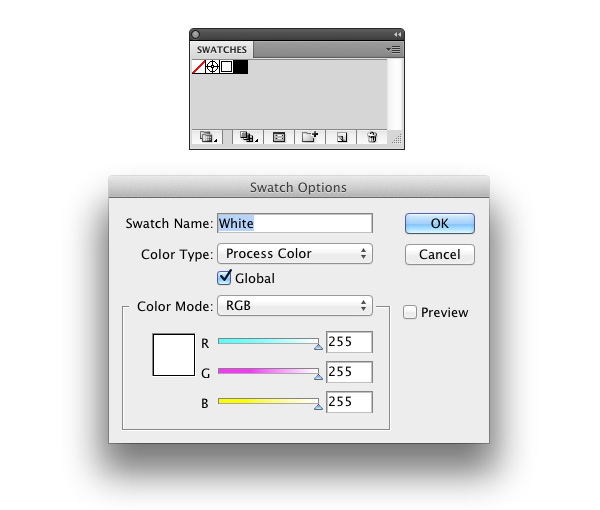
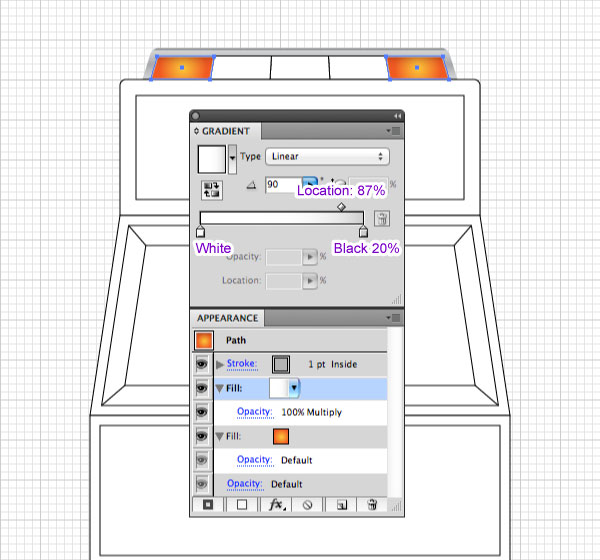
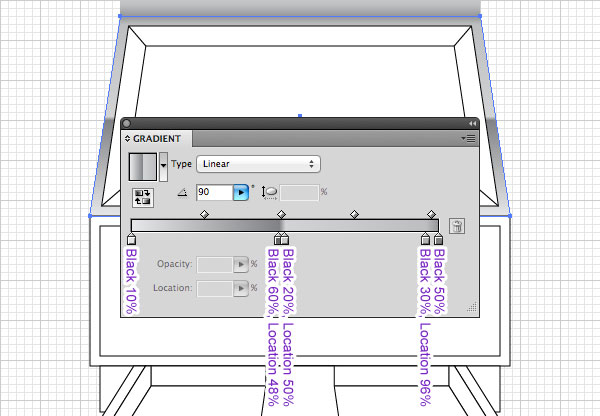
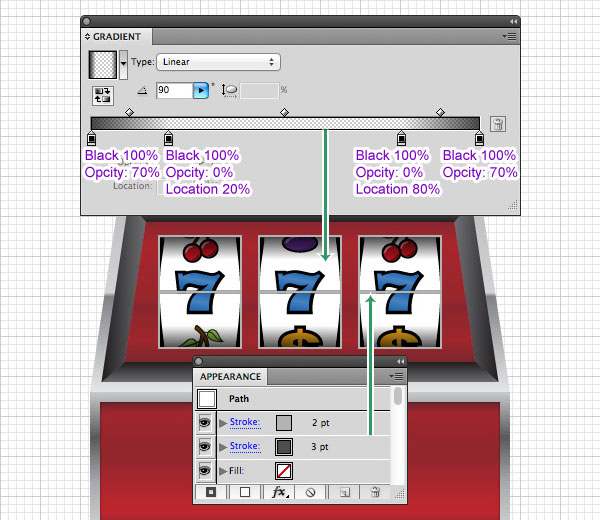
Let’s start with the top. Select the outer shape on the top, and give it the following gradient settings (drag the black global swatch color we prepared earlier over the gradient stops):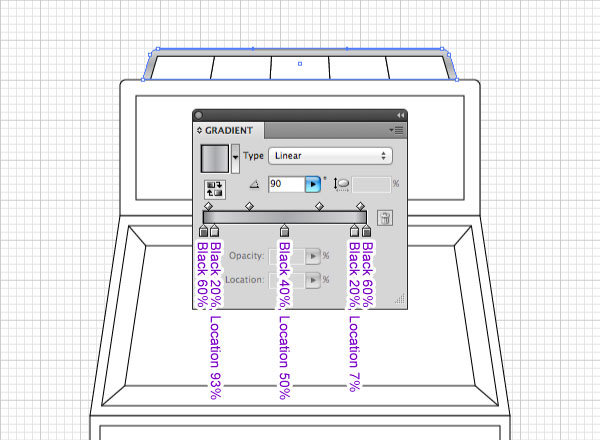
Step 11
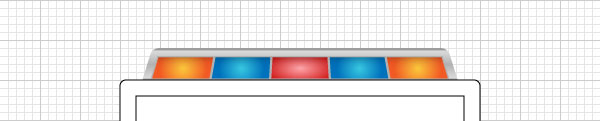
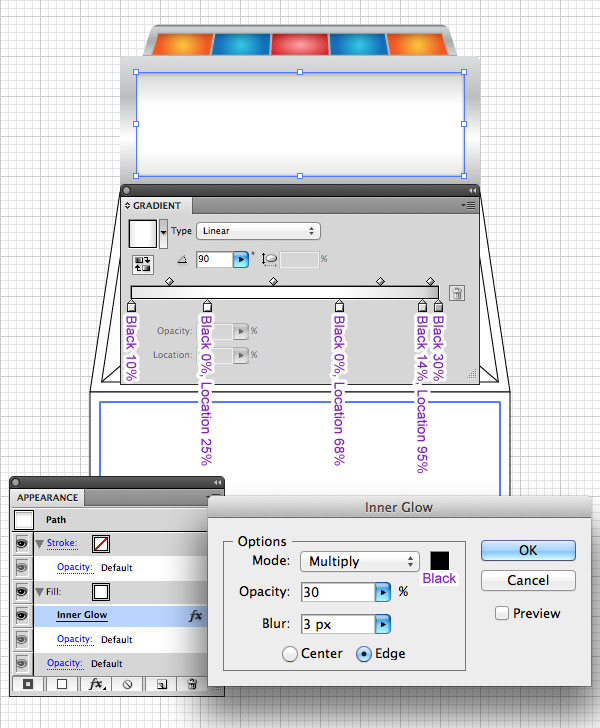
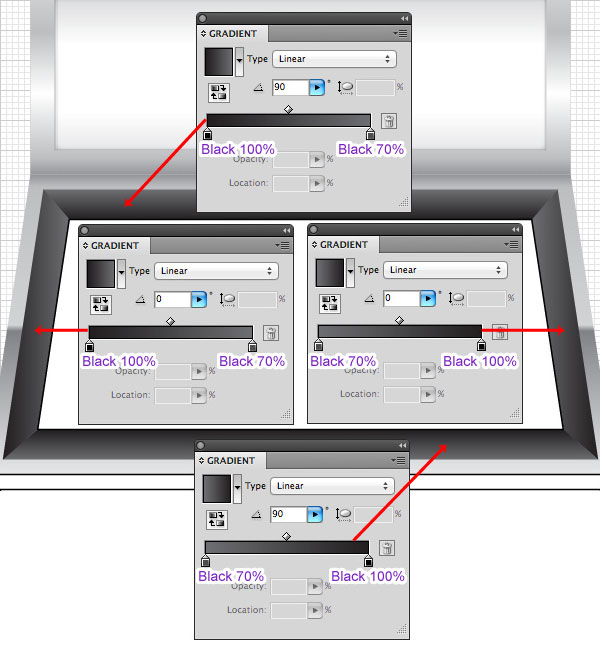
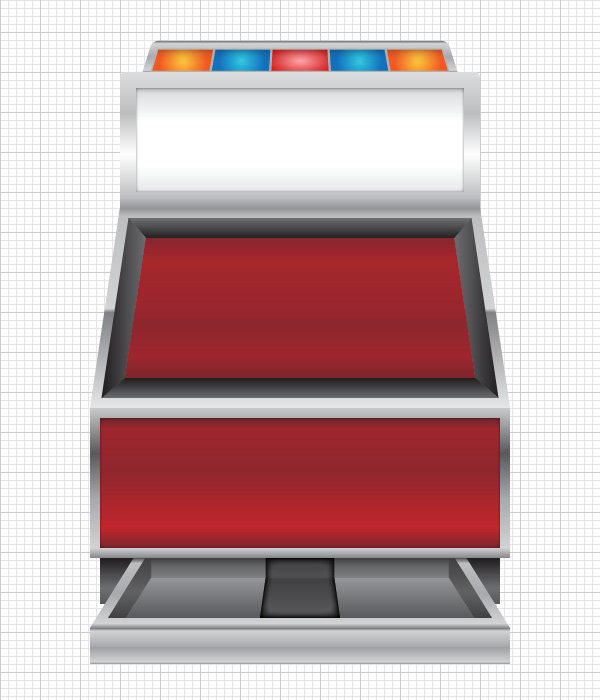
Now let’s proceed to creating the next shapes. Let’s add some metallic colors to our machine. Feel free to experiment and change the colors to your liking. This is what I had in mind: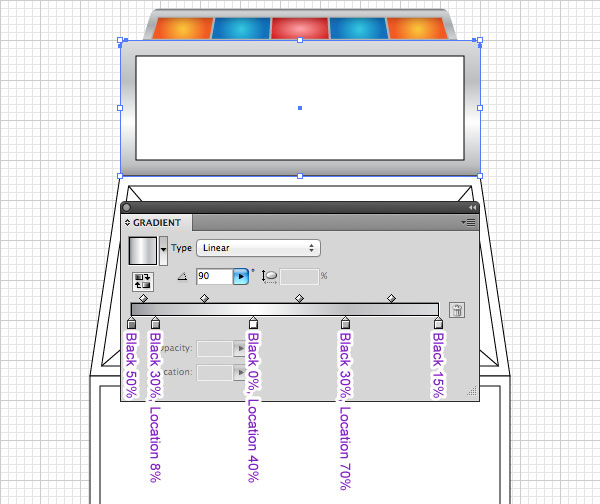

Step 12
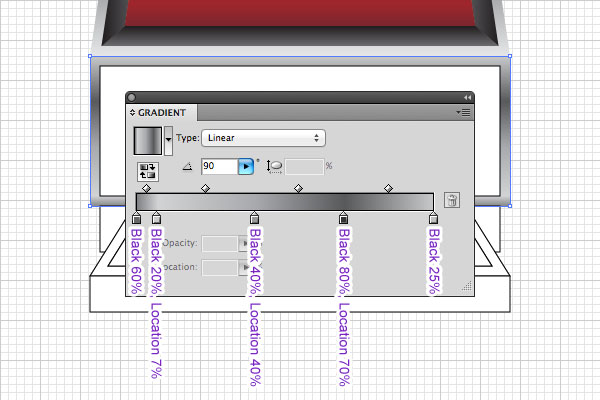
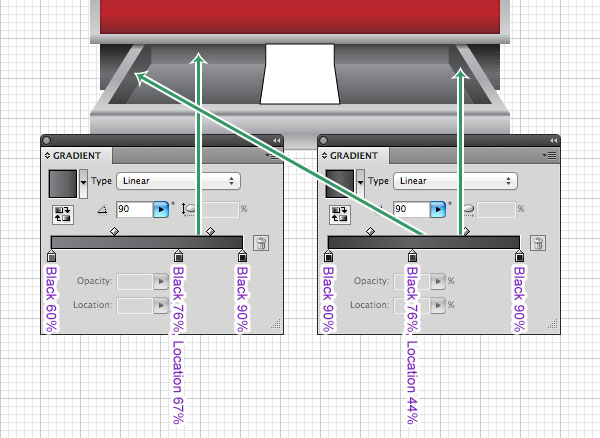
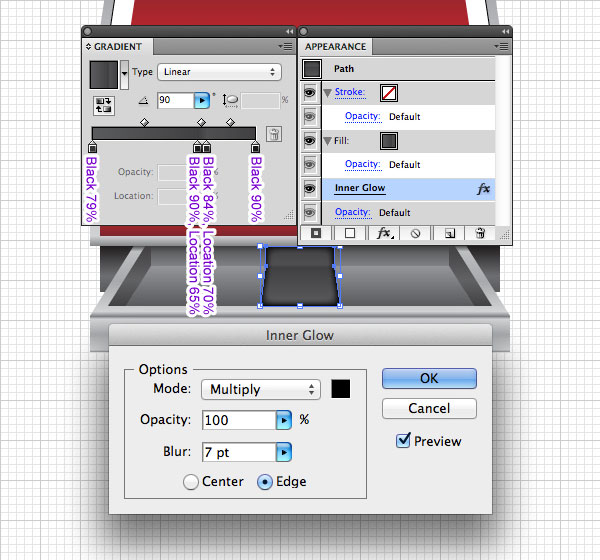
Almost done with the coloring. Let’s just take care of the drawer: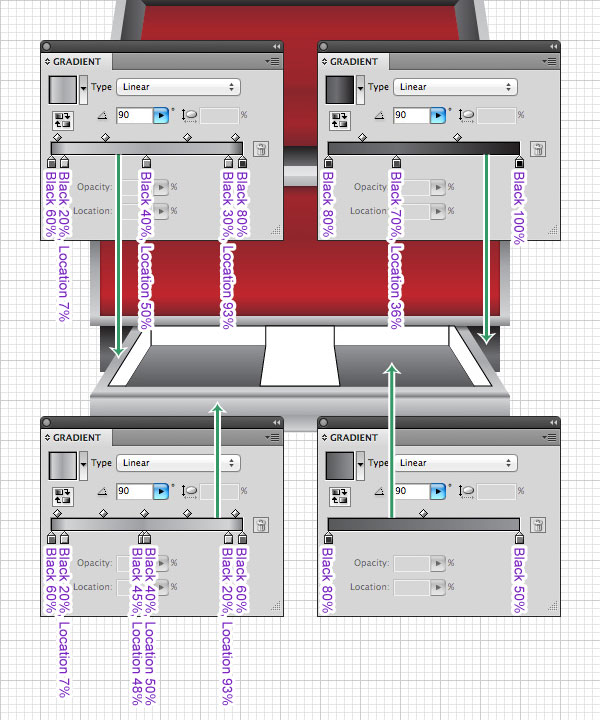
Step 13
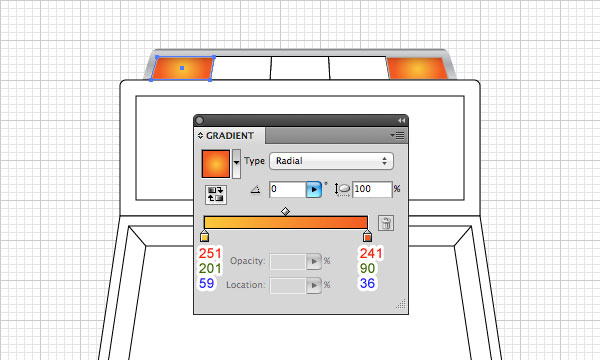
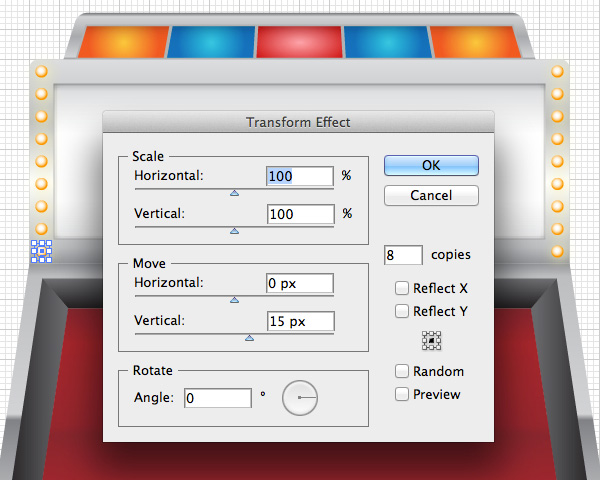
Let’s create bulbs around the outer frame. Create an 8 x 8 pixel circle using the Ellipse tool (L). Place it 4 pixels away from the bottom-left corner and give it the following settings: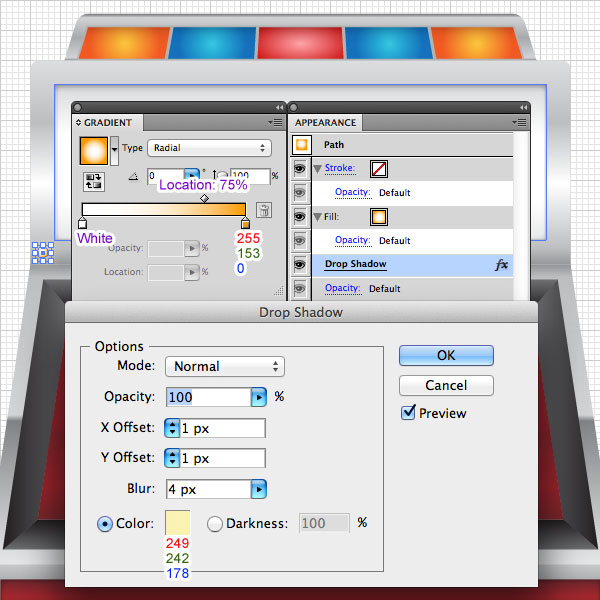

Step 14
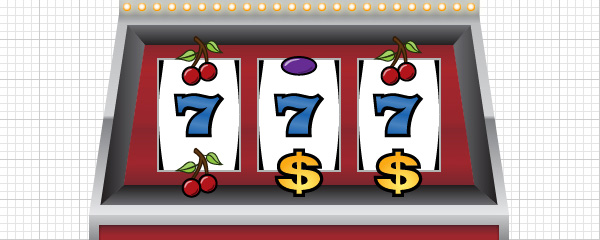
In this step we’ll create the spinning reels. Firstly, we have to create some symbols. Usually these are fruit, the number 7, a dollar sign, etc. I have created the following symbols (which are added in the file), you can add your own.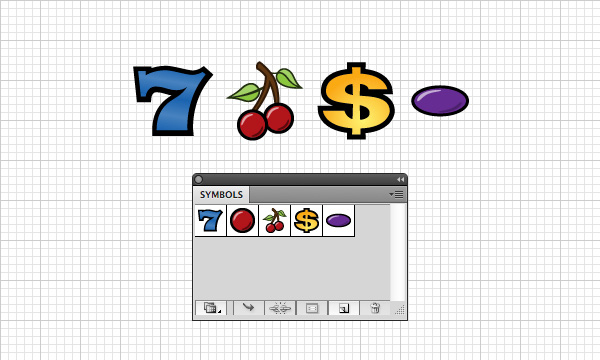
Step 15
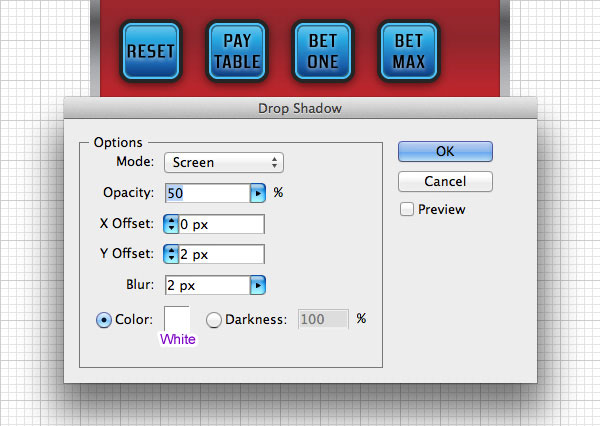
Now, let’s create some buttons for the bottom panel. Draw a 50 x 50 pixel rectangle and give it the following style: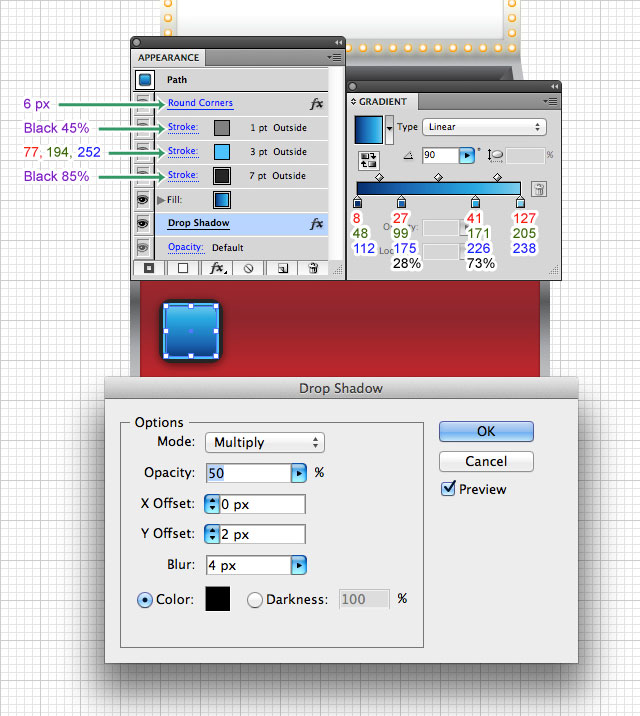
Step 16
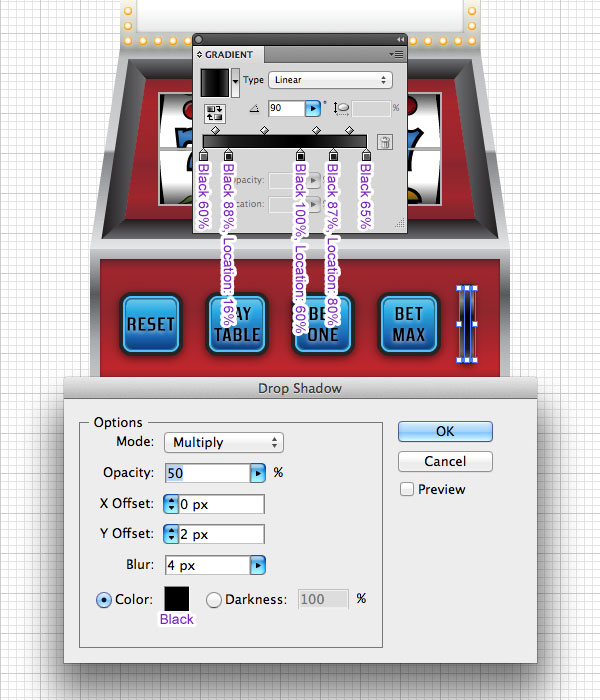
Moving on to the coin slot, draw a 14 x 80 pixel rectangle, with the following settings: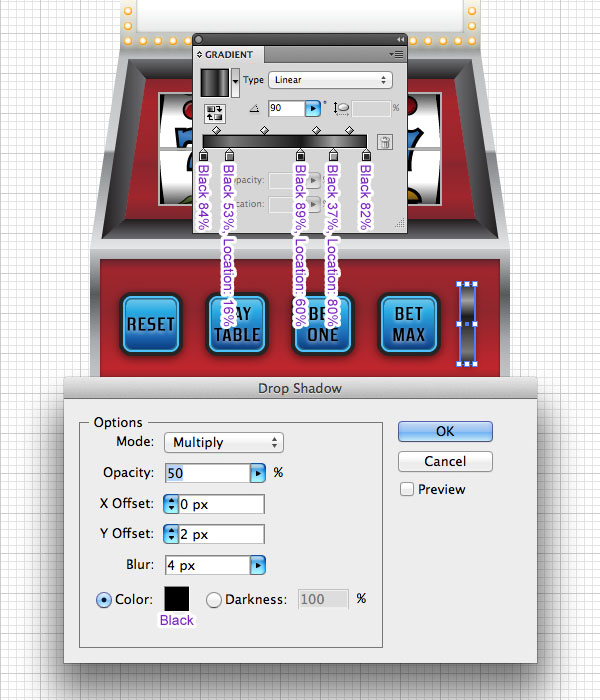
Step 17
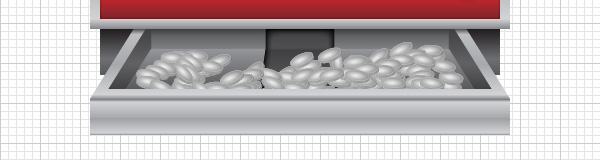
Since we’re all winners in this tutorial, let’s fill the machine with coins. I drew a simple coin, and saved it as a symbol. I used the Symbol Sprayer Tool (Shift + S) to fill the illustration with coins. Double-click the tool’s icon to open up the options window. Try and experiment with the values to get the result you’d like.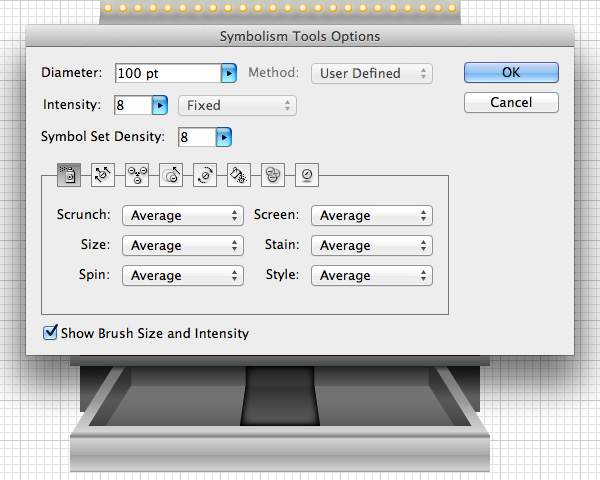
When done, click somewhere on the artboard to release the symbol set, and then create another set of coins. This way you’ll be able to create different layers of the coins and adjust them separately. Then make sure the drawer parts are on top of the coins, as shown below.
Step 18
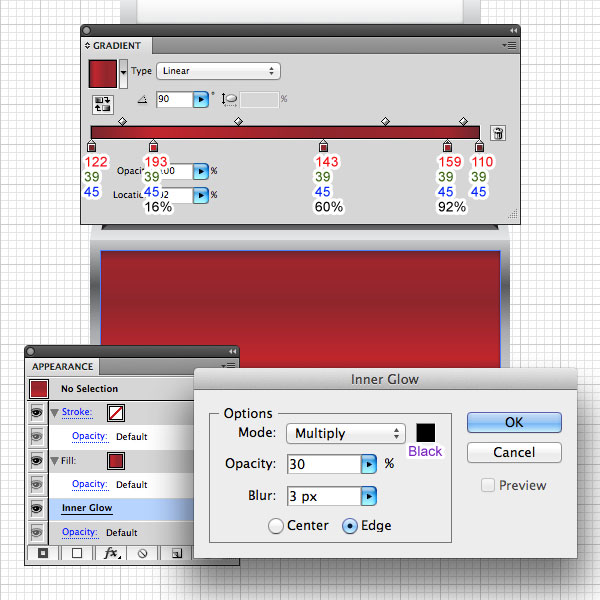
Go back to the top of the machine. Let’s put a nice plate there on the empty metal shape. Use your imagination and inspiration from the images we searched through in step 1 to create classic, casino style branding. Here’s the result I came up with: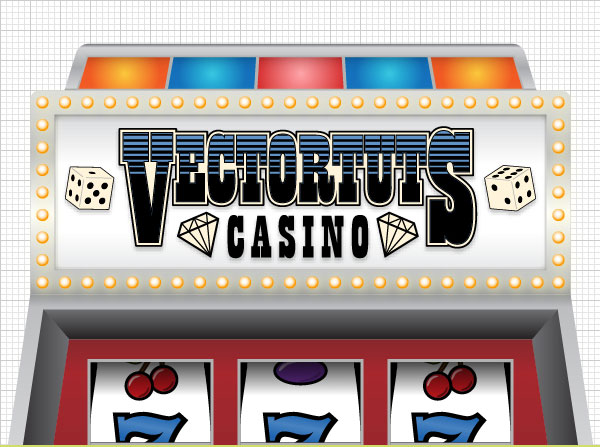
Step 19
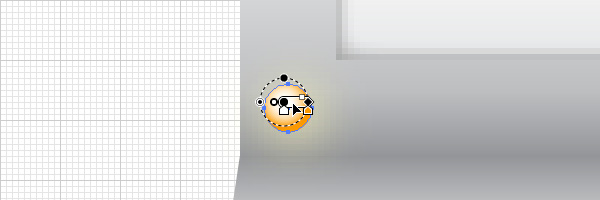
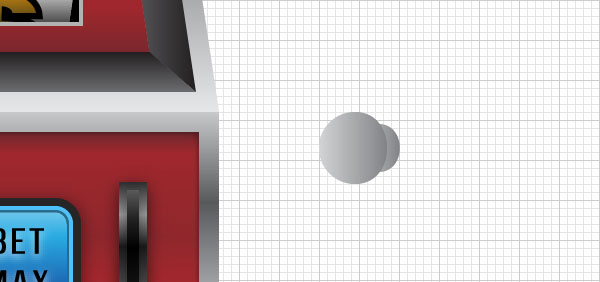
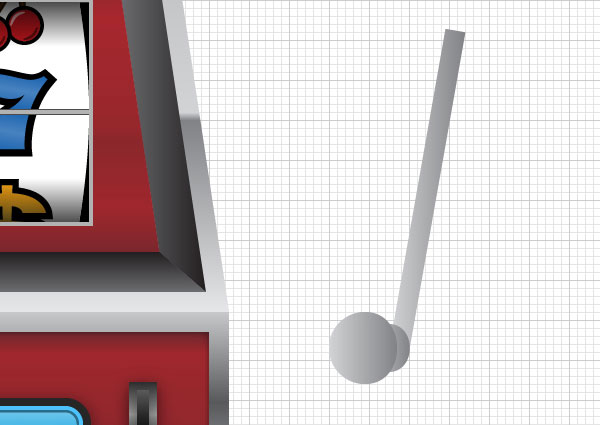
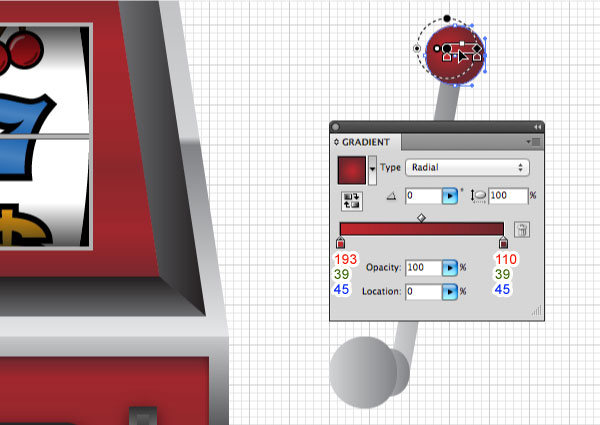
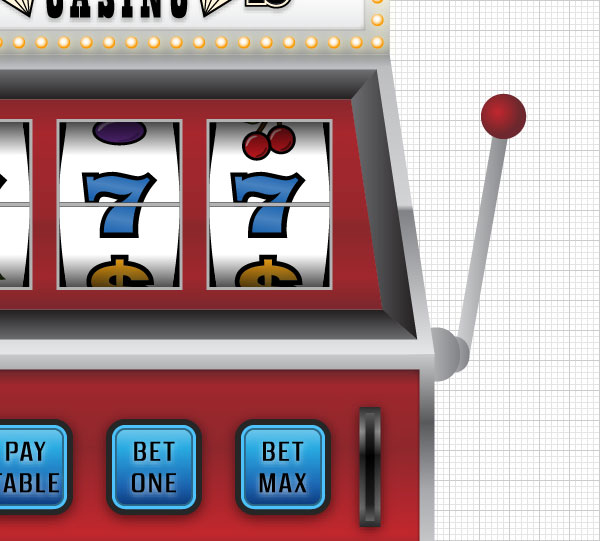
Now we’ll draw the lever. Draw a 36 x 36 pixel circle. Use the Direct Selection Tool (A) to move the right anchor point 2 pixels to the left. Add the following gradient:
Step 20
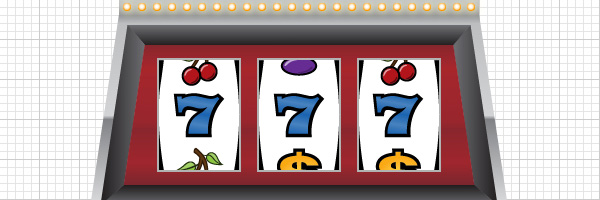
Select the entire machine (Command + A) and group (Command + G) them. Copy and paste in front. In the Pathfinder panel hit Unite. As you can see, it didn’t create one shape, since we have symbols.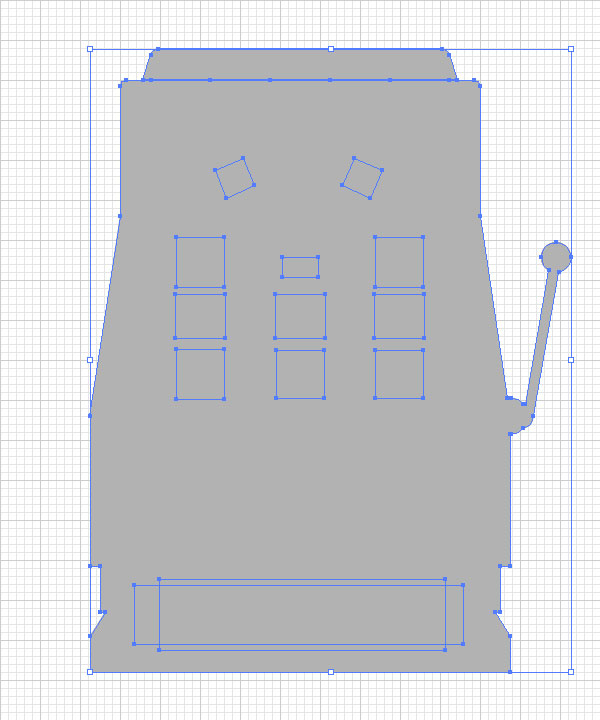

Step 21
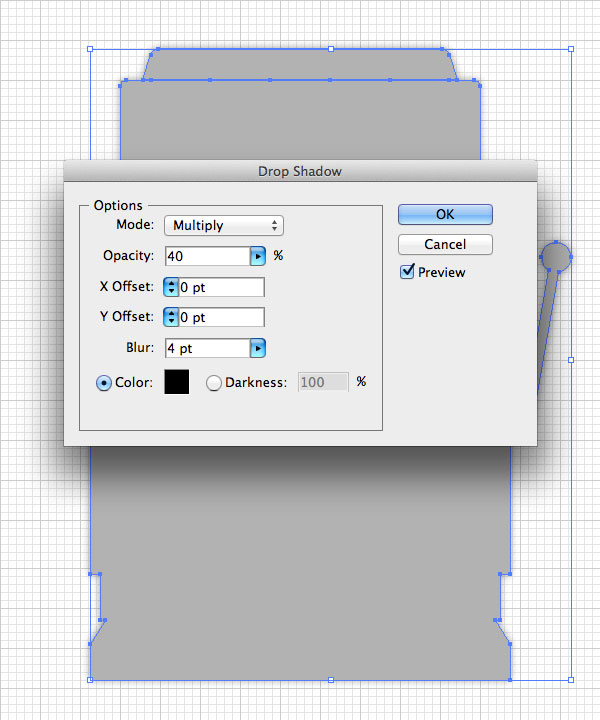
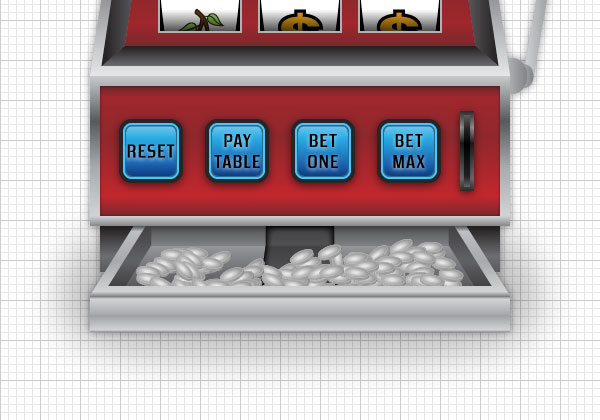
Let’s add some shadow to the bottom of the machine. Draw a black shape, reduce its Opacity to 25% and send it to the back.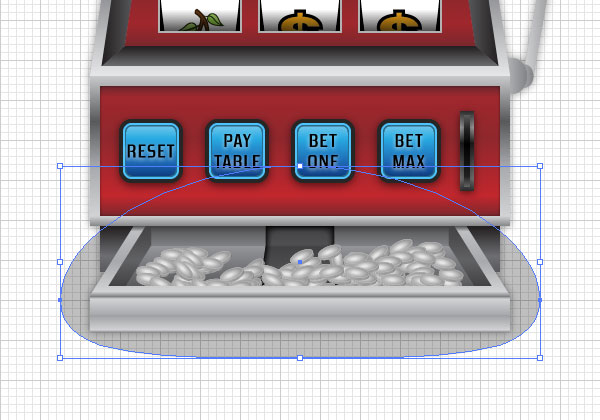
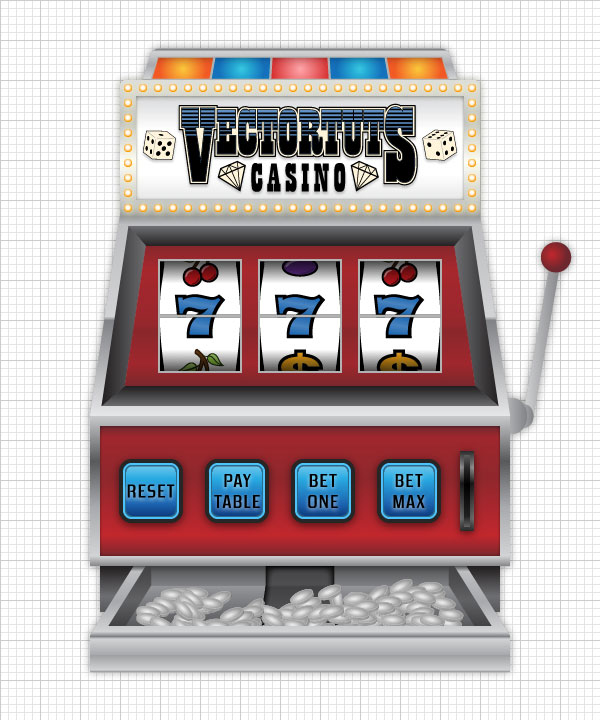
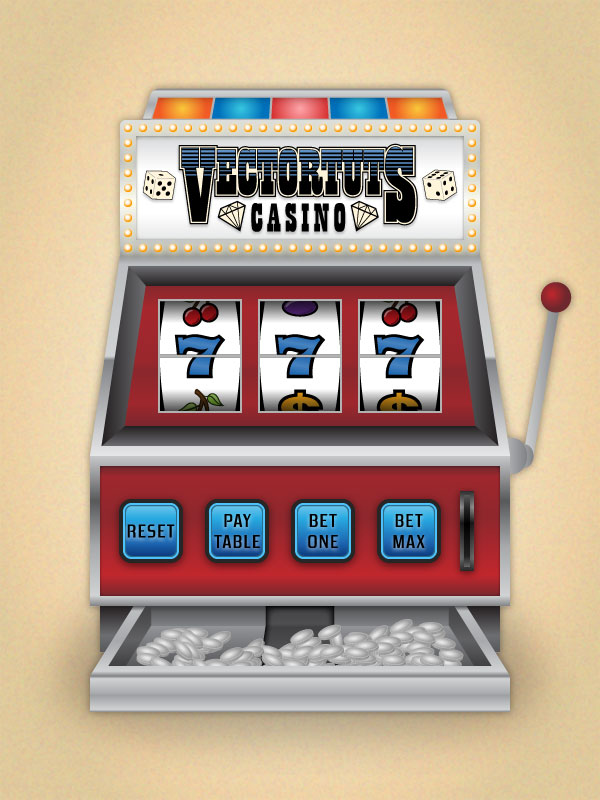
Final Image
For a final touch I added a background layer, and there you have it!In this tutorial we built a slot machine from simple vector shapes. We used the Appearance panel to add effects, used symbols and symbol tools. I hope you enjoyed this tutorial.
Aucun commentaire:
Enregistrer un commentaire